

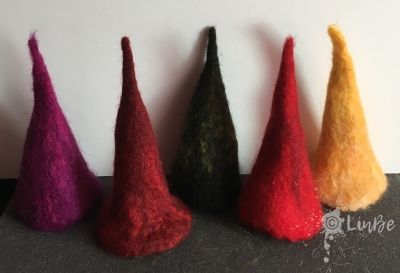
Felting a Gnome is quick and easy and a good place to start needle felting.
Basic equipment needs are:
As you discover the world of felting you will find that not all wool is equal. Coarser roving or core wool has been carded and most of the fibres run in the same direction but it is more spongy and fuzzy therfore it is best used for the base layers of a model. Finer 'tops' has been run through a wool comb so that all the fibres lie in the same direction and there is less air between them this can give a sleeker look to a model, however there are no hard and fast rules for this, so experiment till you find what works best.
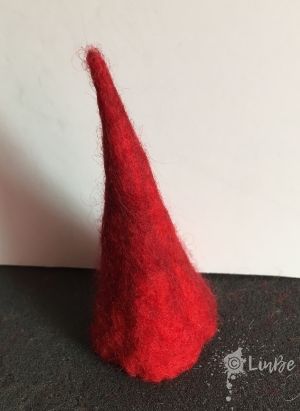
This is constructed as a cone shape. A little weird but gives underlying support for the hat.
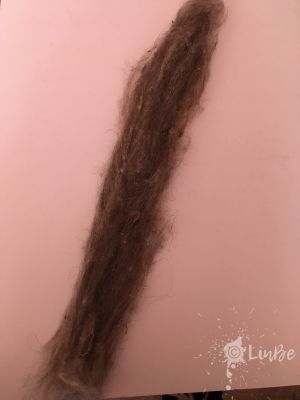
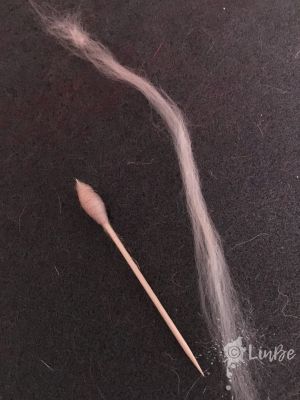
Start with a piece of roving about 12 - 14" long

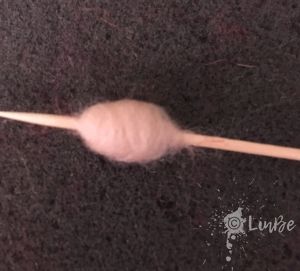
Wrap the roving around a skewer or DPN tapering it at one end to create the cone shape. Stab it a few times to secure the ends. Slide it of the skewer and continue to stab using the felting surface for support and to save your fingers!
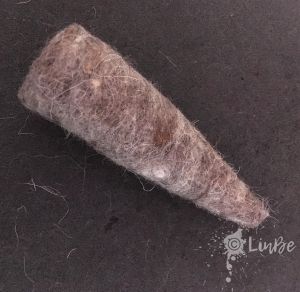
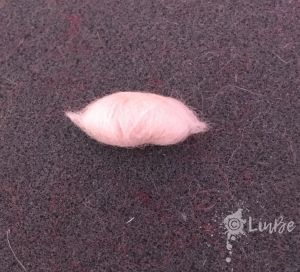
Keep jabbing with the needle, rotating the cone as you go to keep things even. Eventually you will feel the fibres becoming firmer. Don't over do it as you still need the gnome to be squeezable.
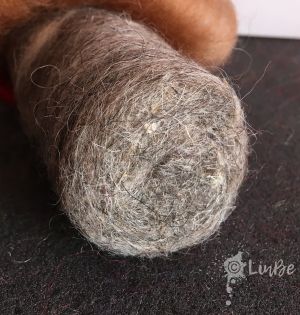
For the base to be firm keep stabbing untill the fluffy edge fibres seem to go up into the body. keep checking to see if your gnome will stand up.
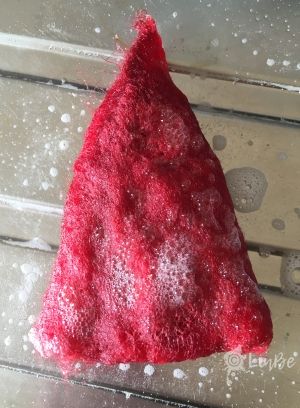
This is made flat and then formed into a cone.
Pull tufts of roving or tops and place in the rough shape of a cone approx. 4" (10cm) wide at the bottom of the hat. Do several layers. You can also add other colours in at this stage too.
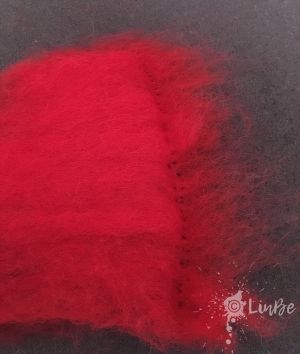
Stab all over the layers to secure, then using a single needle create a stabbed line where the brim of the hat will be.
Fold over and secure the looser fibres, this will give a cleaner edge. Continue to stab the layers until they feel firmer. Don't do much around the other three edges, the fuzzy fibres help to fix the hat together in a cone.

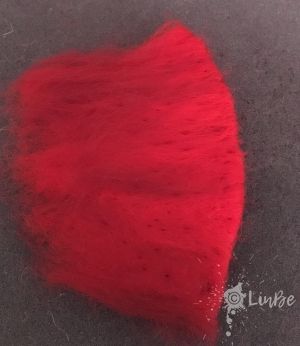
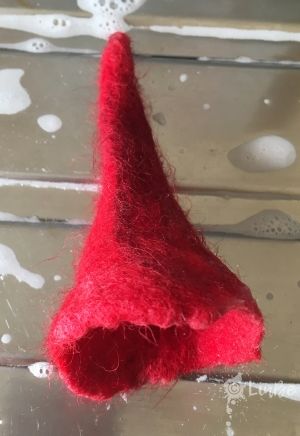
Roll the hat over into a hollow cone and secure by stabbing from the inside of the hat. Using the needle from the outside go along the seam, you can do this flat but making sure the hat is still hollow as you go freeing up any joined fibres inside. Keep jabbing until the hat comes to a pointy end.
The hat after the dry felting needs more shape, so this is where the wet felting comes in handy.
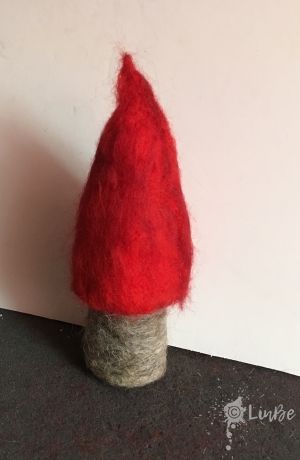
If you try the hat onto the gnome body you will find it is too big and sloppy!
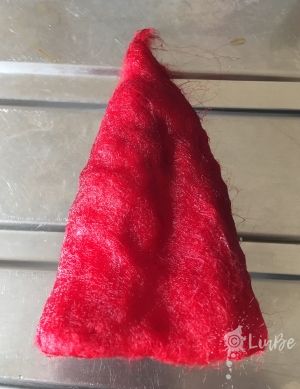
Soak the hat in some hot water to relax the scales.
Apply soap or detergent to both sides of the hat - any will do - I keep a mix of detergent ready made in an old spray bottle.
Roll the hat between your palms, concentrating on the pointy end more. It shouldn't take more than a few rolls so keep checking! Rinse the suds out in hot and then cold water. The cold snaps the scales shut.

Hang the hat up to dry, although a good go in a salad spinner can get rid of excess water ;)
When still slightly damp, shape the hat with your fingers to smooth and turn out the brim.
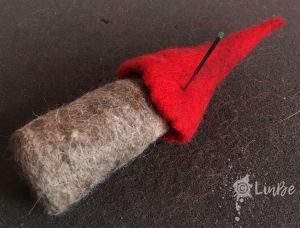
Place the hat onto the gnome cone and secure by jabbing. this will take a little longer as the wet felted hat has fewer free scales, so be patient it will hold eventually!
No hats are the same!
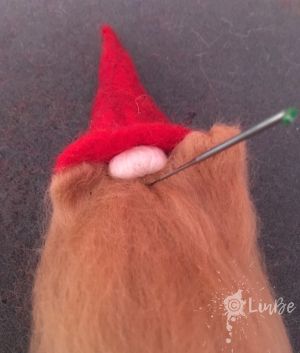
The nose utilises one of the basic needle felting shapes. I dont know if it has a proper name but I like to call it a pillow!
Wrap a thin piece of flesh coloured top around a cocktail stick. Add more strands until the nose is the right size - 1/2 inch ish(1.5 cm) wide.
Smooth and tuck in the wisps at both ends of the pillow.
Slide the pillow off the cocktail stick and stab all over a few times to fix the fibres in place and it doesnt unravel, but you want to keep the surface smooth.
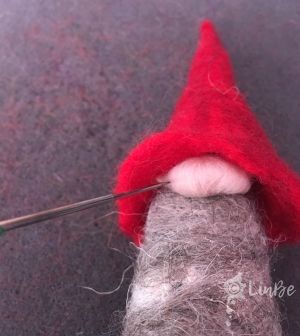
Position where you want the nose to be and use a single needle to jab at the sides, underneath and top side of the nose until its firmly stuck.
The beard starts like the hat but on a smaller scale
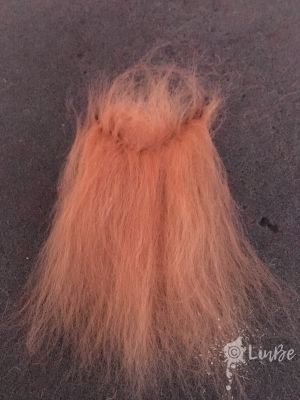
Pull off a few tuffs of the beard colour - I mainly use tops to give a silky look. Lay these down on the felting surface. You need about 2" (5 cm) x 3" (7.5 cm) and 3 or 4 layers. Give a quick all over jab then concentrate on the end that will attach under the nose and hat. Create an u shape as a fold line.
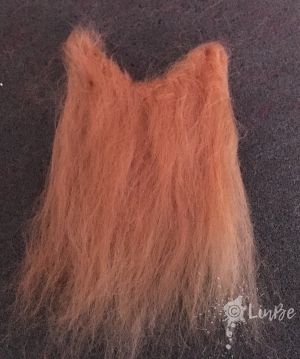
Fold the ends over and secure by jabbing at the back and front. Keep the jabs light and lift from the felting surface often to stop the beard going fluffy.
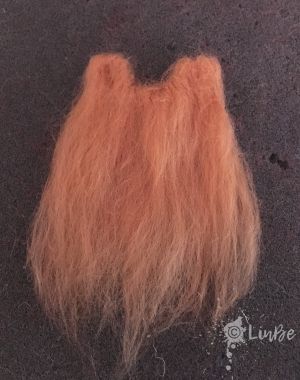
Refine the shape to go under and up the sides of the nose
Place the beard under the gnome nose and starting centrally stab the beard into place one side at a time.
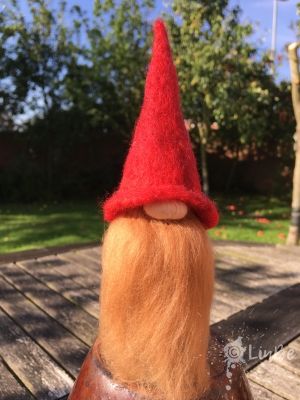
The finished Gnome!